1. week 1
  2. week 2
  3. week 3
  4. week 4
  5. week 5
  6. week 6
  7. week 7
  8. week 8
  9. week 9
  10. week 10
  11. week 11
  12. week 12
  13. week 13

Aniboom: Latest hits

Tuesday, November 23, 2010

Fall 2010 wk 10 & 11:
—11/23: Tu, 12:25 - 3:25;
—11/20: Fri, 9:00 - 12:00;

Hi everybody,

I continue to be displeased with 75% of my Tuesday class. With little more than 3 weeks to go, many of you continue to put off your work and do little from week to week. It is unfortunate for you, and I hope it isn't too late.

The steps below have a lot to do with what we did this week in class regarding making the eyes blink and the cow's head move back and forth, only this time it refers to the cat. For those of you who were not in class this week, you will be required to make all three characters in this animation (cat, dog, cow) have blinking eyes and heads that move back and forth.

Carter-

  1. TOPICS:
    1. Review:
      1. LINK   —Pushing-in to a shot;
      2. LINK   —Cutting from one shot to another shot;


    2. Introduce:
      1. LINK   —Movie-Clips revisited: Making the cat move and play the fiddle;
      2. LINK   —Breaking apart symbols;
      3. LINK   —Frame-by-Frame animation I: making the cat move its eyes;
      4. LINK   —Frame-by-Frame animation I: making the cat smile;


  2. HOMEWORK:Please work on your animations this week. You should make as much progress as possible until we meet in our next class. For my TUESDAY class, that will be in 2 weeks. Good Luck!


  3. STORYBOARD: below you will find links to each of the pages of the storyboard containing 3-frames each.
    • LINK   Frames 1-3
    • LINK   Frames 4-6
    • LINK   Frames 7-9
    • LINK   Frames 10-12
    • LINK   Frames 13-15
    • LINK   Frames 16-18
    • LINK   Frames 19-21
    • LINK   Frames 22-24
    • LINK   Frames 25-27
    • LINK   Frames 28-30
    • LINK   Frames 31-33


  4. INTRODUCE:
    1. Movie-clip:To begin, we are going to get the cat to start playing the fiddle for us. Since this action is going to be a repetitive movement, it is perfect for a movie-clip symbol. That way, we only have to make it move in one cycle, and the movie-clip will play in a continuous loop. Graphic symbols do not do this. Therefore, we have to edit the cat_mc symbol.

      If you recall, we already made all of our characters into nested movie-clip symbols (week 10), we can just add some animation to it, and we will be good to go. Once again, we have already done this as well when we made the dog's and cow's heads move back and forth (week 10). The cat's movements are a bit more complex, however, so it deserves further review.

      1. First, double-click on the cat_mc symbol in the library to enter symbol-edit mode.

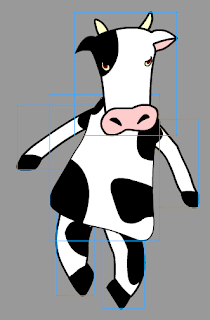
      2. If you have only one layer here, then we'll have to separate everything out into different layers. So, first, click in frame one. When you do this, everything becomes selected. If you see a bunch of blue boxes, then you're in good shape. This means that each of the cat's parts is a separate graphic symbol, all here within the main cat_mc symbol.

        If not, if everything has white dots, then you MUST be certain that you convert each part of the cat into a graphic symbol before you can proceed.

      3. Once everything is selected, the move the arrow (selection tool (V)) over the cat and right click. Then choose distribute to layers.

        This will put each of the graphic symbols in a separate layer. It will also name the layers according to the name of the symbol. If any of the layers are blank, or have an untitled name, then you should delete them.

      4. Now, lock all the layers except the cat_head layer. Depending on how your cat looks, and how many different parts you have created, the stacking order of your layers may be different from what you see in the images above and below.

      5. Then, select the free-transform tool (Q) so that we can position the head to begin looking like it is moving back and forth to the music the cat is playing.

      6. Click on the image above to make it larger. You should see that once you select the free-transform tool, you then have to move the rotation point, the small white circle that is now in the center, down to the point where the cat's head meets its neck. The reason for this is that the neck is where we rotate our heads, so if the cat is going to be moving its head back and forth, it only seems natural to have it occur at its neck, and not around its nose or eye!!

        Don't put the rotation point right exactly at the edge where the head meets the neck, but slightly above it. This will make the rotation look better, and seem more lifelike.

      7. Then, rotate the cat's head a little to one side. Don't rotate it too much as you don't want the cat to look as if its neck has broken.

      8. Now, click in frame 20 of the cat_head layer and add a motion tween, and then, right after that, right-click in the last frame and add a keyframe (F6). Since we are going to be making the cat's head move back and forth as if to the music, and since this is all happening within a movie-clip symbol, it will be a looping animation. We only need make the cat's head move from one side to the other, and then back again one time. And, since it is a movie-clip, it will automatically loop indefinitely when played.

        Because of this, because it will loop around over and over, in which the end of it is really the beginning of another loop, the last frame must be the same as the first frame.

        This is where Flash helps us: when we added a keyframe, Flash copies the previous keyframe in frame 1 and places a duplicate in frame 20. Therefore, now frame 1 and frame 20 are exactly the same, which is as we want it. If you click in frame one, and then in frame 20, you will see nothing on the stage changes. This means they are the same.

      9. After that, extend the duration of the other layers to frame 20 by clicking F5.

      10. Next, click in frame 10 of the cat-head layer, and add another keyframe, F6.

      11. Choose the free-transform tool (Q) again, and rotate the cat's head in the other direction a little.

      12. http://dma111.blogspot.com/2009/11/hi-everybody-i-was-happy-with-way-you.html
      13. That completes the head movement, so if you test the animation, you will see that the cat's head moves back and forth.

        The next part that we have to add to this movie-clip, is to make the cat play the fiddle. We will take similar steps to make the cat's arm move as if it is playing the fiddle with the bow.

        To begin, then, we must lock the cat_head layer, and unlock both the bow layer as well as the arm layer, which in my case is named cat_arm2. However, we are only going to work with one of those layers at a time, so hide the bow layer.

      14. We will do several things to the arm to make it appear as if it is moving the bow across the strings:

        • We must move the rotation point;

        • skew the arm;

        • Rotate it a some;

        • Shorten the length out a little;

        • And, adjust it at the top where the arm meets the shoulder to remove the gap.

        We'll start in the up position, so I'm first going to move the rotation point:

      15. Now, We'll rotate and shorten it a little. Also, if there is a gap at the point where the arm meets the shoulder, I will have to close that with the arrow keys on the keyboard:

      16. Next, show the bow layer and move the bow so that it looks as if the cat is holding it. You may need to rotate it in order for it to look right.

      17. Add a motion tween to both layers.

      18. Click in frame 10 of both the cat_arm2 and the bow layers and add a keyframe (F6); then, click in frame 20 and add another. This will make the keyframes 1, 10, and 20 all the same. Those keyframes mark the up postions.

      19. Now, that we have the up position set in those three keyframes, we must set the down position. In order for the arm to appear as if it is moving up and down, the up and down positions must alternate keyframes, which means, we need keyframes in frames 5 and 15 to set the down position.

        Therefore, click in frame 5 of both those same layers and add yet another keyframe (F6). Here you will need to transform the arm so that it looks like it has pulled the bow downward.
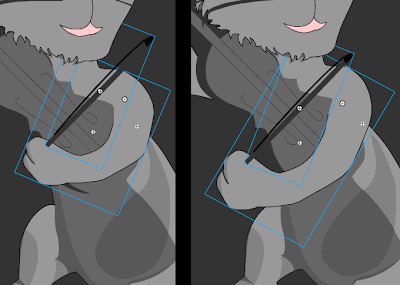
      20. After that, click in frame 15 of both the bow and the cat_arm2 layers again, but this time add a keyframe (F6) again.

      21. Let's stop for a moment and assess what's happening in all of these keyframes: in frames 1, 10, and 20, the arm and bow are in the down position, and in frame 5, the arm and bow are in the up position. The way it works up to this point is that in frame 1, the arm starts down. It moves up in frame 5, and then moves back down in frame 10. What we're working towards then is an up/down/up/down/up positioning. This means that in frame 15 we want the arm to be up again. The easiest way to do this is simply to move it to the up position. You can do this because you've already added a keyframe.

        Make certain you also move the bow into place in the same frame in the bow layer.

        Once completed, you now have a cat that moves its head and plays the fiddle. Exit symbol edit mode.

    2. Cut I: cutting the to a close shot of the fiddle as the cat plays. If we begin where we left off in the last blog entry, we are in the very last frame of our animation. The particular frame number is irrelevant, but i will be beginning here in frame 300 as we watch the cat playing the fiddle.

      At this point in our animations, we have seen the movie and title fade in and out; we have panned down from a shot of the sky to a view of our our setting on the ground; we have panned right passing the dog, the cow, and stopped at a cat playing the fiddle; and finally, once we reached that cat, we have zoomed into the cat as it played until we were at a medium shot of it in which we captured the cat within the frame from head to toe.

      According to our storyboard, we must now cut to another shot: a close shot of the fiddle as the cat plays it. To create the illusion of a new camera shot, we simply have to re-compose all the elements on the stage, the cat and everything else, the ground, fence, house, etc. In order to do that, however, we must first add a series of keyframes to those layers that will make up part of the shot. If an element is not going to be part of the shot (if it will not be visible in the frame, on the stage), then its layer does NOT get a keyframe.

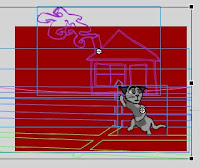
      In the timeline, then, one signal of a new shot is if you see keyframes in several layers all in the same frame. That is what we must do. For our new shot, close shot of fiddle as the cat plays it, we require the following things: the cat, the fence, the house, and the ground. That's all. See the image below and notice where the keyframes are and in which layers:

      1. The Push-In—motion tweens from frames 230 to 275. This includes the cat, cat_shadow, fence, fence_shadow, house, and the ground layers.

      2. A Pausein-between frames from frames 275 to 299. This includes the cat, cat_shadow, fence, fence_shadow, house, and the ground layers.

      3. A Cut—keyframes in frame 300. This includes the cat, fence, house, and the ground layers.

      4. The Close Shot of Fiddle—frames from frame 300 to 320. This also includes the cat, fence, house, and the ground layers.

        The image below is what the cat and the stage should look like for the close shot of the fiddle. Notice how big the fiddle is relative to the size of the stage (the gray rectangle behind the cat). Remember, you must select all the keyframes in the shot and resize them at the same time.

        Nothing really happens in this shot. All the animation is within the movie-clip symbols, so we need not add any additional animation. All we need to do is extend the duration of the elements in the shot so we can view them and take in the shot for a moment. I extended the elements of the shot out to frame 320. I chose 320 because the animation in the cat_mc animation loops every 20 frames, and that way we get a full cycle of the cat playing the fiddle.

    3. Cut II: cutting the to a close shot of the cat's face. If we continue with the same logic, the next step is very similar to the previous. We simply need to add another series of keyframes to the layers that will be part of the next shot. Since the next shot consists of the same elements as the previous, we add keyframes to the same layers which I do in frame 320.

      I then simply move everything upwards so that the cat's face fills most of the stage area. If you want to enlarge everything a little more so that the cat's face is even bigger, then do so.

      We'll extend these layers out to frame 340. I choose 20 more frames again because I want to include at least one full cycle of the cat_mc movie-clip which is 20 frames long.

      We have now completed two new shots: close shot of fiddle, and close shot of cat's face. These two shots very closely follow frames 10 and 11 of the storyboard (see LINK). Hopefully, you will also notice two things about frame 11, that the cat is looking out at the audience toward the "camera" and that the last line beside the image in the storyboard says that the cat smiles. These changes, modifying the expression of the cat, is the next step in our animation.

    4.  
    5. Expression change: changing the cat's expression

      1. Breaking Apart: breaking the cat_mc symbol;

        1. Our next task is twofold: to make the cat move its eyes so that it is looking out at the audience, and then to make it smile. So that we can make it do this, we have to change the cat so that it is no longer a symbol. You might ask: why do we need to do this? Well, think about it for a moment. If here, inside cat_mc symbol, we make the cat look out at the audience and smile, it will then be part of the symbol.

          But what does that mean? Well, it means that wherever you use the symbol, then the cat will be looking at us and smiling over and over repetitively. It will no longer be looking out in space with a funny smirk on its face. We do not want this to happen. We only want the cat to look at us and smile one time, and then to look away.

          That means it CANNOT be part of a symbol. Therefore, we must break apart cat_mc. First, however, we have to exit cat_mc by clicking on Scene 1 in the upper-right corner if you have not already.

        2. Once you do that, make sure you are in the last frame of the cat layer, which is frame 340 for me and add a keyframe (F6).

        3. Select the cat on the stage by clicking on it one time, and then break apart (ctrl-B) the symbol. You will see that when you break it apart, the one symbol is broken into all of its body part symbols, into several symbols.

        4. But this is still not what we need. In order for this to work, the cat cannot be a symbol, so we must break-apart (ctrl-B) again. Now you will see that most of the cat is no longer a symbol. You know this because there are no more blue boxes, just the little dots when the cat is selected.

        5. The only exception to this are the eyes. They still have a blue box around them, which means they are still part of a symbol, so we have to break apart (ctrl-B) one last time. When you've done this, the symbol will no longer be a symbol.

      2.  
      3. Moving the eyes: Now that we have broken about the cat's symbols, we can start to work on the eyes, so zoom up on the eyes to begin.

        Since we want the cat to look out at the audience we'll have to do the following:

        1. You'll have to move the colored parts of the eye to the left and down a little, as well as make them a little larger and more rounded. Let's start with the right eye.

        2. You will also have to move the pupil so that it is more in the center as well as skew it so that it is more symmetrical.

        3. And finally, you'll have to fill in the spots with the paint bucket tool where the color had been erased.

        4. Repeating those steps somewhat differently for the left eye, you will also have to move the colored part of the eye so that it is more toward the corner of the eye as well as a little larger and reshaped so that it is somewhat more circular. Make certain that it is a little smaller than the other eye, however since it is a bit further away.

        5. Similarly, you will also have to move the pupil so that it is more in the corner of the eye, and skew it so that it is more symmetrical.

        6. Then, with the paint bucket, fill in all the gaps left behind. There, now that you have moved the eyes, they should look as if they are looking out at the viewers.

        7. Moving the eyes: We want to give the cat a few moments to just look like that out at us, then we want to make him smile.

          So, click in frame 350 of the cat layer, and add a keyframe (F6). Then, extend the duration (F5) of the other layers out to frame 350.

      4.  
      5. Smiling Cat:

        1. Next, we will work on making the cat smile. To do this we will be doing a new kind of tween animation. As you know, anytime you need to make a tween, there can only be one object on the stage. The same goes for this new sort of tween, so we will have to put the mouth on its own new layer. Therefore, select the mouth, and cut (ctrl-X).

        2. Add a new layer, and name it cat_mouth.

        3. Click in frame 350 of the cat_mouth layer and add a keyframe (F6).

        4. Click in frame 350 of the cat_mouth layer, and paste-in-place (ctrl-shift-V).

        5. Now that the mouth is in a new layer of its own, lock all the other layers. Then, click in frame 355 of the cat_mouth layer, add a keyframe (F6) in it, and extend the duration of the other layers out to frame 355.

        6. In this new keyframe, change the cat's mouth into a smile.

        7. Now, click in between those two keyframes, frame 350 and frame 355, open up the properties bar, look where it says tween, and select shape. It should turn green and have an arrow pointing to the right. If you drag the playhead back and forth, you should be able to see how the mouth changes into a smile.

        8. Finally, extend the duration (F5) of the layers out to frame 380, save, and test the movie.

       
    6. INTRODUCE:

        1. Return to the Movie-clip: Changing the cat's expression back, and going back to the movie-clip;

        2. At this point in the animation, we have made the cat stop playing the fiddle by breaking apart the movie-clip, we have made the cat then look out at the audience, and then we have made it smile.

        3. Next, we would like to allow the cat to return to playing the fiddle. We could do this rather easily, by placing another copy of the movie-clip, cat_mc back on the stage in the cat layer (after placing a blank keyframe (F7) of course), but that would be problematic. Sure, it would solve the problem, but it would be a very quick jump back in the cat's expression. It would avert its eyes to the side again, the smile would fade, and it would begin playing the fiddle all at once, at the same time. It would be too sudden and jerky.

        4. Therefore, what we'll do instead is first make the cat look back off to the side, then we'll cause the smile to fade, and then after that, finally, he'll resume playing the fiddle. First step, however, is to look at the state of things in the image below:

        5. If we look at the timeline, we'll soon see that in frame 340, we have broken the cat_mc symbol apart, and moved its eyes so they're facing outward. In frames 350 through 355 the cat's mouth is converting into a smile. This expression and all the other layers are then extended out to frame 380.

        6. What we want next is to make the cat's eyes move off to the side again. We'll have to copy & paste from another frame. However, we do not have another frame from with to copy them. The most recent keyframe in which they eyes are looking off to the side is frame 320, but here the cat is part of the cat_mc symbol. There is no keyframe yet in which the cat is not a symbol, and with its eyes looking off to the side. So what we'll have to do is copy & paste the symbol, and then break it apart (ctrl-B) again.

        7. To do this, click in frame 320 and copy (ctrl-C).

        8. Then, click in frame 381 of the cat layer, add a blank keyframe (F7), and paste-in-place (ctrl-shift-V)

        9. Next, select the cat on the stage by clicking on it one time, and break it apart (ctrl-B). You will probably have to do this a few times until it has no more blue boxes remaining.

        10. After you do that, make sure you are in frame 381 and that everything is de-selected. Once done, delete the mouth from this frame, and color it back in like the images above demonstrate.

        11. Next, we have to make the mouth go back to the way it was originally, as it is in the cat_mc symbol. Click in frame 381 of the cat_mouth layer, and add a keyframe (F6).

        12. class="bold">Now, we'll copy an paste the mouth from frame 350 so that it goes back to its original expression.

          • So, click in frame 350 of the cat_mouth layer
          • and copy (ctrl-C).
          • Then, click in frame 385,
          • add a blank keyframe (F7),
          • paste-in-place (ctrl-shift-V),
          • and extend (F5) the cat layer to 385 also.
        13. Open up the properties bar; then, where it says tween select shape. It should turn a greenish color with an arrow pointing to the right.

        14. Lastly, we want to finally go back to the movie-clip, so click in frame 386 of the cat layer and add another blank keyframe (F7).

        15. Once you do this, click in frame 320 of the cat layer and copy (ctrl-C).

        16. Then click back in frame 386 and paste-in-place (ctrl-shift-V).

        17. To complete this section, extend the duration (F5) of the following layers out to frame 410:

          • cat
          • fence
          • shadow
          • house
          • ground
          • moon
          • stars

Thursday, November 11, 2010

Fall 2010 wk 9:
—11/10: Tu, 12:25 - 3:25;
—11/13: Fri, 9:00 - 12:00;

  1. TOPICS:
    1. Complex Symbols:
      • LINK   Graphic Symbols—creating the initial graphic drawings of your characters, and creating all of their parts as individual symbols;
      • LINK   Nested Symbols—placing symbols within symbols;
      • LINK   Animated Symbols I—animating symbols within symbols: moving the cow's head;
      • LINK   Animated Symbols II—animating symbols within symbols: giving the cow blinking eyes;
      • LINK   Animated Symbols II—animating symbols within symbols: making the cat play the fiddle;
  2. HOMEWORK:This week, work on your animation projects. We will be working on these animations from now until the end of the term. The assigned homework is always going to be the MINIMUM amount you should accomplish during the week, so I highly recommend you do MUCH MORE each week.

    • COMPLETE work on creating complex symbols for your characters as demonstrated in class with the cow, and in this week's posting.
    • For ALL your characters make certain and create blinking eyes.
    • Complete the FADE-IN of the very beginning of your animation for class next week.
    • Complete the TITLE FADING-IN and OUT for your own animations for class next week.


  3. STORYBOARD: below you will find links to each of the pages of the storyboard containing 3-frames each.
    • LINK   Frames 1-3
    • LINK   Frames 4-6
    • LINK   Frames 7-9
    • LINK   Frames 10-12
    • LINK   Frames 13-15
    • LINK   Frames 16-18
    • LINK   Frames 19-21
    • LINK   Frames 22-24
    • LINK   Frames 25-27
    • LINK   Frames 28-30
    • LINK   Frames 31-33
     
  4. Fade-In:
  5. what you see here are the way the layers should be stacked and how that should make the stage look. Now we must start the animation.

    1. Click in frame 80 of the fade layer and extend the duration (f5).
    2. Then, click in frame 20, Select the rectangle on the stage by clicking one time on it.
    3. Open the properties bar and change the alpha to 0%. When you do this, notice that a little dot (a keyframe) automatically gets added where you have clicked, where the playhead is.
    4. Right-click between frames 1 and 20 select create motion tween. This creates the fade in.
    5. Now, click in frame 80 of the title layer and extend the duration (F5). Repeat this step for the stars layer also.
     
  6. Fade-Out:
  7. Now that we have the Fade-In portion of the animation, let's set up the Fade-Out part.

    1. Next, right-click in frame 70 of the fade layer to begin the fade-out sequence and select INSERT KEYFRAME >> COLOR .
    2. Then, click in frame 80 of the fade layer, right-click and select INSERT KEYFRAME >> COLOR again.
    3. In frame 80, select the rectangle on the stage by clicking one time on it.
    4. Again, open the properties bar and this time change the alpha to 100%.
    5. As before, make certain that you have extended the duration (F5) of the other two layers out to frame 80.
    6. Lock and Hide the fade layer.
     
  8. Title Fade-In/Fade-Out:
  9. At this point, we have the opening and closing of this very first scene: the fade-in/fade-out sequence; however, we do not have the title fading in yet. If you read FRAME 2 of the storyboard, you will see that the title fades-in over the stars, and then fades away again. This is our next step.

    1. Since the title doesn't begin to fade-in until after the stars and sky have already faded-in, we won't begin the title fade-in until frame 20. That will be where the fade-in begins. Therefore, since the motion tween begins there, click in frame 1 of the title layer and then release. You must then click AGAIN, hold down, and drag to frame 20. Notice that when you do this, the area before frame 20 turns white. This means that it is blank. This makes sense because we have moved the keyframe past this area to frame 20. So let's think about this: since the title doesn't even begin to fade-in until frame 20, it does not even need to be there at all until then. As it was before, however, it was inframe 1. We did not need it there. Therefore, we clicked in frame 1 of the title layer and moved it to frame 20 where it will begin the fade-in of the title.
    2. Good, now the title doesn't even arrive into the animation until frame 20. Furthermore, it should only gradually become visible starting here, in frame 20. That means that in this frame, frame 20, we must changle the opacity of the title. To do this, choose the selection tool (V) and select the title on the stage.
    3. Next, open the properties bar and change the alpha to 0% to make the title invisible.
    4. Now, right-click and select add motion tween.
    5. After about 20 more frames, the title should be fully visible, so right-click in frame 40 and INSERT KEYFRAME >> COLOR (if color is not available to click on, then choose ALL).
    6. By this frame, frame 40, the title should be fully visible; however, as you can see, it is still invisible. Therefore, with the selection tool (V), click on the little circle in the middle of the invisible title symbol on the stage to select the title.
    7. Then, open the properties bar and change the alpha to 100%. This will complete the fade-in of the title. Next then is the fade-out portion.
    8. We must allow some time for the viewer to read the title and let it sink in, about 20 more frames. Only after that point in the timeline does the timeline begin to fade away again. That means that the fade-out begins in frame 60 of the timeline—so right-click in that frame and select INSERT KEYFRAME >> COLOR (if color is not available to click on, then choose ALL).
    9. The fade-out of the title will go a little faster than the fade-in, so it will take fewer frames, only about 10. So, right-click in frame 70 of the title layer and select INSERT KEYFRAME >> COLOR (if color is not available to click on, then choose ALL).
    10. By this time, however, the title will have completely disappeared again, which means we must reduce its opacity. Using the selection tool (V) click on the title on the stage in frame 70 to select it. Then open the propterties bar and reduce the alpha to 0%. This should conclude the fading-out of the title.
      Below you will see the timeline as it appears at the end of these steps:
     
  10. INTRODUCE—CHARACTER SYMBOLS II:
    1. Graphic Symbols—making the entire drawing one single symbol:
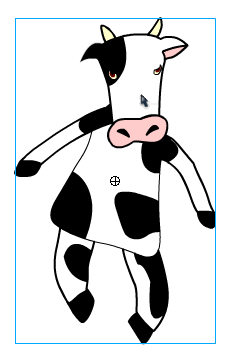
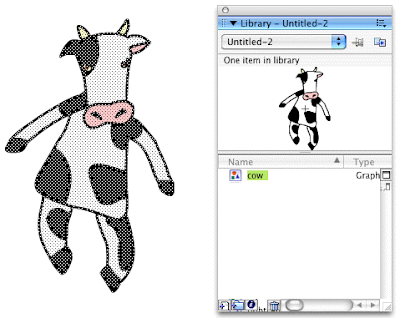
      1. Following last week's blog posting regarding the dog symbol, here I am goind to show you also how you might create your cow symbols. After you have drawn your cow character, select the entire drawing (if there is nothing else on the stage, click in frame 1 of the layer to this).

      2. Click on F8 to Convert to Symbol.

      3. Give it a unique name (name it cow), select graphic for behavior, and then click okay.

       
    2. Complex Symbols—creating nested symbols: symbols within symbols, that is what we will begin working on in this section.
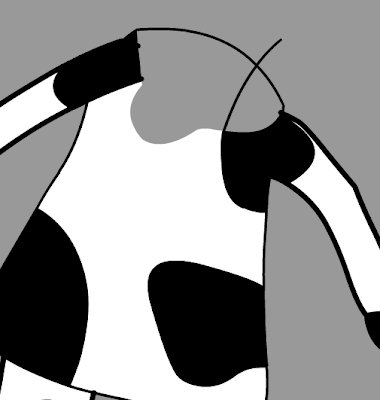
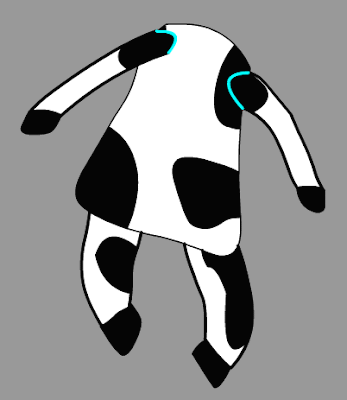
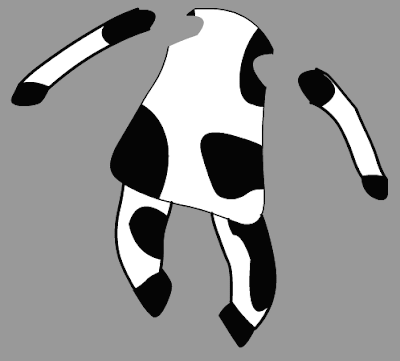
    3. Sometimes it is necessary to create complex symbols. In the following situation, we will make the head, the body, the legs, and the arms into separate symbols. First, we must break apart the graphic symbol that we have already created. To do this, select the cow symbol by clicking on it one time.

    4. Next, break the symbol apart by selecting ctrl-B. At this point, the drawing of the cow on the stage is no longer a symbol instance; however, if you look into the library, you will see that you still have the symbol there.

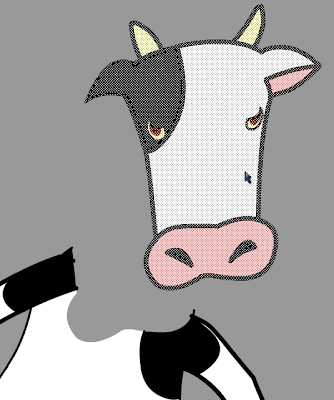
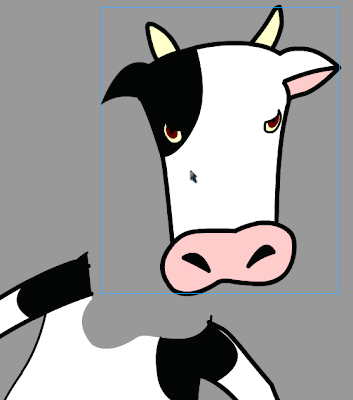
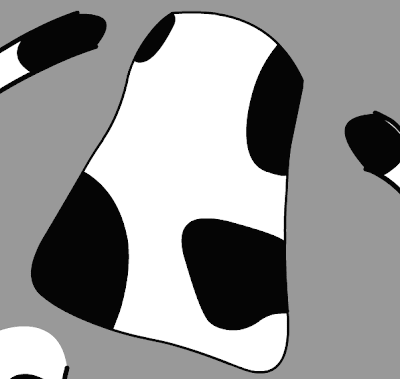
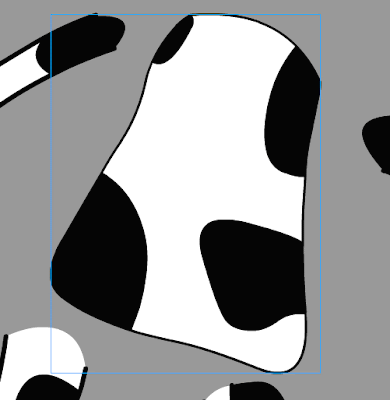
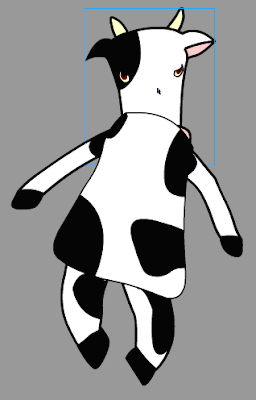
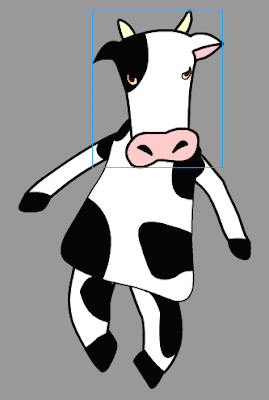
    5. Now, select only the head of the cow. To do this you must use the arrow tool, and zoom up very close. Make certain you get all of the pieces of the cow’s head in the selection. It is very important that you do not leave any piece of the head out of your selection.

    6. Next, once you select the head, choose the arrow tool (V) and move the head away from the body.

    7. If you find that there are pieces of the head left out, little fragments of lines or color, then undo until the head goes back into place, and try selecting again.

    8. Once you select the head and move it away from the rest of the cow’s body, then convert it into a symbol (F8).

    9. Give it the name cow_Head, select graphic for behavior, and then click okay.


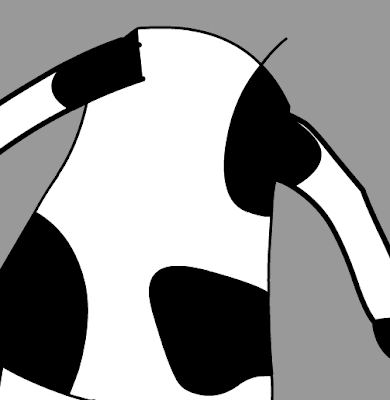
    10. Now, look at the cow’s body. You should notice that there are little gaps in the body where the head used to be. Fill in these gaps and round them out.

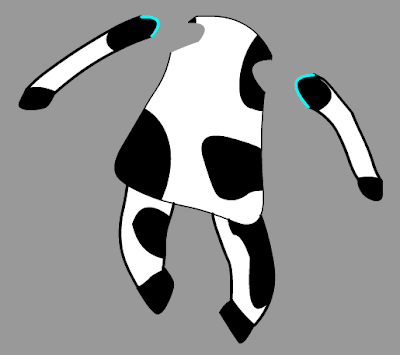
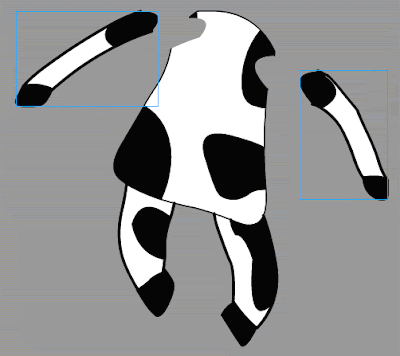
    11. Once done, let us try and select one of the arms of the cow; however, you will probably soon see that in such a case, when you click on the black area, it selects the black on the arm, as well as all the black on the body. So, we'll have to separate the arm from the body by drawing a single line. We can do this with a colored line so that we can see it stand out from the rest of the drawing. We will also know that we have to later delete the line. We can do so with both arms right now.

    12. Now, double-click on one of the arms and move it away from the body. Then, do the same thing to the other arm.

    13. Remember to delete those lines that you drew to separate the arms from the body.

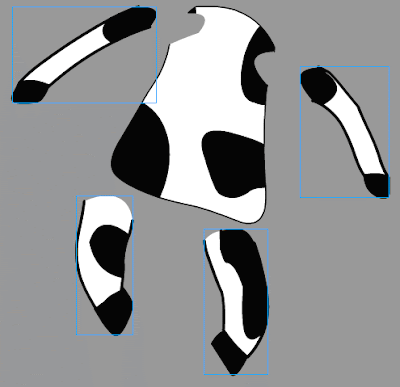
    14. Then, select one arm at a time and convert them to graphic symbols. Name them cow_arm1 and cow_arm2.

    15. We need to do the same thing for the legs, although with this particular cow, they will be a bit easier than the arms. Therefore, simply select each leg, one at a time, move them away from the body, and convert them into symbols named cow_leg1 and cow_leg2. Don't forget to round out the tops of the legs, and to remove the strokes there.


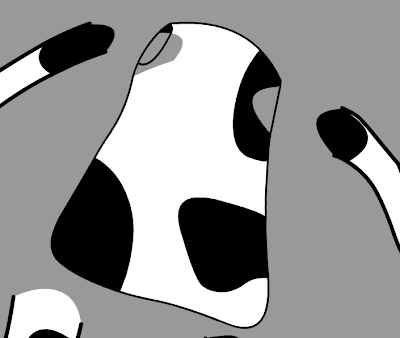
    16. Before we convert the body into a symbol, you may have noticed that there are gaps missing from the body, chunks cut out where the arms used to be. We must fill these two areas in before we convert the body into a symbol. To do this, we must use the line tool again to close off the spaces, and then the paint bucket to fill them in.

    17. Finally, select the body, and convert it to symbol (F8). Give it the name cow_body, select graphic for type, and then click okay.

    18. Now that we have at least five graphic symbols, you may try to put them all back into place, as in a puzzle. You will find that the head is below the body, partially hidden by the body. To correct this, select the head by clicking on it one time.

    19. Next, go to Modify >> Arrange >> Bring to Front. This will put it above the body. Repeat this for the arms so that they are also above the body.

    20.  
    21. Movie-Clip Symbols—combining all the individual graphic symbols into one single movie-clip symbol:
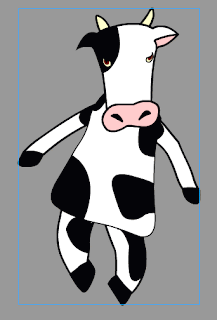
      1. Once the cow is reassembled and looks like it did originally, we will put it together into a single symbol. As it is now, it is composed of six parts: the head and the body, the two arms, and the two legs; but we want to envelope all of these parts together in a single symbol. To start, we must select all the symbol instances, each of the body parts together.
      2. They must all be selected in order for this to work, so make certain you see blue boxes around them all. If so, then click on F8, convert to symbol.
      3. Give this new symbol the name of cow_mc, select Movie Clip for type, and then click okay.
     
  11. INTRODUCE—'CAMERA' PANNING MOTIONS:
    1. Layers—Stacking Order;
      1. For our beginning in this entry, we'll start where we left off with our posting last week when we faded into the movie and the title—see above fade-in/fade-out. Let's first observe, however, what the layer stacking order is:

        1. fade
        2. title
        3. tree_near
        4. dog
        5. cat
        6. fence
        7. cow
        8. ground
        9. moon
        10. stars
      2.  
      3. Symbols—As you can see from the example above, that we have already completed the very beginning of our animation in which the sky fades in, followed by the title. If we compare this little animation so far to our storyboard, we will soon see that we have completed the first three frames at this point (frames 1-3); however, our goal now is to complete a few more frames from the storyboard, namely the ones that include the panning motions. There are two of these camera movements, pan down from the sky to the ground, and pan right from the dog to the cat. Since our 'camera' is stationary, since we cannot move our imaginary camera, we have to figure something else out.

        If we think of our camera as the stage (everything must pass across the stage in order to be in the shot), then we realize that instead of moving the camera, aka the stage, across everything, then we must instead move everything else across the stage, aka the camera.

        To pan down, to move from above the ground, down to the ground, we must put everything, the entire landscape, below the stage.

        Therefore, since we have to make everything move, everything must then be a SYMBOL

      4. The stage is the smaller grey rectangle in the upper left. Notice how everything in the scene is placed below the it. Also, notice how the elements that set the scene, the tree, the ground, fence, etc., together all are more than 2 times as wide as the stage. This is so as to allow for the pan right movement as well. As mentioned, I created a landscape that is approximately 2.5 times the width of the stage.

      5. Pan Down—Starting at the point where the title fades out, frame 90 according to our last class demonstration (but it could be any frame depending on your individual animation) we will begin the panning motion.

        The title fades out by frame 90, so we will begin the pan down after this, say at frame 100. Therefore, we will need to move all our objects in all the layers that contain elements from the scene to this frame: tree_near, dog, cow, cat, fence, shadows (if you have any), tree_far, ground, moon, and stars. The movement begins in frame 100, so the easiest way to move the objects there in each layer is to first select frame 1 in the tree_near layer. We do not need to concern ourselves with the fade or title layers because they will not be panning down.

      6. Then, hold down on the shift key and click in frame 1 in the bottom layer (this should be the stars layer.

      7. This should select frame 1 in all the layers that have objects in the landscape.

      8. Once selected, then release. Now click again on the selected frames in frame one and HOLD DOWN, but do NOT DESELECT. Instead, drag these frames to frame 100 where we will need to begin the panning motion. Be careful not to drag the frames up or down a layer. If you make a mistake, simply undo (ctrl-Z) and try again. This point, frame 100, is the beginning point of the pan down motion.

      9. Now, we need to extend the duration to mark the end of the pan down motion. We'll give the movement about 150 frames, which would put us in frame 250. So, click in frame 250 in the tree_near layer, hold down on the shift key, and click in frame 250 of the bottom layer, the stars layer. This should select frame 250 in all the layers. Then extend the duration (F5). Right-click over the highlighted area IN FRAME 250, and add a motion tween.


        ***Careful NOT to deselect anything at this point.***


      10. When you zoom out (do not deselect), you should see that everything below is still selected with the blue boxes around each object. This is what we want. It will help us move everything together. Please, do NOT use the selection tool. Instead, to do this, hold down on the shift key (to help us move things faster) while you click on the up arrow key on the keyboard. Do so until the ground and all is on top of the stage. Notice how a keyframe is added at the end of each of the motion tween in frame 250 after you move everything. This will cause everything that was below the stage to move gradually upwards until it is on the stage.

      11. Pan Right—Now that we have completed the pan down camera movement, we have to work on the pan right. One clue as to how to do this is to notice that the ground and fence and entire scene that we drew is more than 2 times the width of the stage. This means that we will push everything to the left in our motion tween this time to simulate the pan right motion of the camera.

        This time, we will give this movement about 150 frames; so, in the tree_near layer, click in frame 400, hold down the shift key, and click in frame 400 of the ground layer, and extend the duration (F5). This time, do NOT include the moon and the stars.


      12. Once again make sure you do NOT deselect anything. Just hold down on the shift key and use the left arrow key on the keyboard to move everything selected to the left until the right edge of the ground is just hanging offstage to the right. Once again, notice how the keyframes were automatically added at the end of the duration.

      13. Finally, click in frame 225 of the moon and the stars layers and extend the duration (F5). There is no need to move them. They should just sit in the sky behind everything as the landscape pans by.

     
  12. REVIEW I:
    1. Pushing-in to a shot:
    2. If at any point the animation seems too short or too long, then undo and redo it. You will have to adjust the number of frames, add more frames to make it slower, and remove frames if it needs to be faster. More than likely, below, the animation is much too fast which means EVERYONE WHO FOLLOWS THE INSTRUCTIONS BELOW SHOULD LOOK AT THE ANIMATION AND ADJUST THE NUMBER OF FRAMES UNTIL IT LOOKS RIGHT.

      1. Now that we have reached the cat, according to our storyboard we must push-in, or, in other words , get closer to the cat. To push-in simply means to push the camera closer to the object of interest. In this case, it is the cat. We have already passed all of the characters and we have already seen the landscape, or setting, of our story. When we reach the cat, we will truly begin telling the story.

        The sequence of movements we are completing now, the pan and push-in, is known as the establishing sequence. It is called this because it establishes, or sets up the beginning of the animation, and tells us all of the most important information about the setting and the main characters. In the nursery rhyme, Hey, Diddle, Diddle!, our script, and our storyboard, the beginning starts with the cat. Therefore, when we reach the cat, we will begin telling our story.

        Now that we have reached the cat, we can begin telling our story, so we push-in, or, we get a little closer so as to get a better look, to pay closer attention to what we will see. This is what the "camera" does for us when it gets closer.

      2. We will start in the frame wherever you left off. In my case, I am at frame 360. But let us first analyze the scene: if we look at the stage, we see that all that is left there are the cat, the fence, the house, the ground, the moon, the stars, and the shadow from the fence. The cow, the dog, the tree, etc, all have already passed across the stage and left the area. They are no longer part of the current shot. That is limited to the cat and the house behind, for the most part. As a result, when we push-in to the cat, we do not need to deal with those things that are off-stage, only what is on-stage.

        We will first lock and hide those layers we do not currently need: tree_near, dog, cow, shadow, and tree_far. Furthermore, since we will not be making the moon and stars larger, we will also lock those layers.

      3. Next, we want to scroll over to determine where we want the next keyframe to be. We'll give the viewer a brief pause before we actually begin the push-in action of the camera, just as we did between the panning motions. That means we'll put a keyframe to mark the start of the panning motion, and I'll say let's give ourselves about 15 more framesfor this pause. Keep in mind, however, that we ONLY need to select those layers which are NOT hidden or locked. To do this, since we have to skip over some layers, instead of holding down on the shift, you must hold down on the CONTROL (the COMMAND key for the MAC) while you click:


      4. Now, to complete the next camera action, the push-in, we need to mark the END of this motion, as we have already marked its beginning (frame 375). So, we need new keyframes in these same layers in frame 500.


        Click in frame 500 in the top layer we are working with, the cat layer, and hold onto the control (or command)add click on those same layers, the fence, shadow, house, and ground layers, and add a keyframe (F6).

        ONCE YOU DO THIS, MAKE CERTAIN THAT YOU DO NOT DESELECT!!


      5. You should notice that all the object, the cat, ground, etc., are still selected and have blue boxes around them; however, if you did deselect, you should try to undo until all the objects are once again selected. If this does not work, the REDO THE PREVIOUS STEP.


      6. Now, turn on the outlines for all the layers except the cat layer. To do this, you have to look where the layers are, and right beside the lock in the top left, you will see a black box. If you click on this, it will put all layers in outline mode. To do this, click on the colored box in the cat layer itself.

        This will allow us to see everything, but also see through them. You might ask why we would need to see through the objects: we not only need to see all the different objects we've drawn such as the house, the cat, the ground, etc., but also the stage itself.

        It will help us when we make everything larger. We need to be able to see the size of the stage because once we make everything larger, much, much larger, if we didn't turn on the outlines, everything would be so large we wouldn't be able to see the stage at all, and so we wouldn't be able to judge how large everything was.

      7. Then select the free transform tool (Q), hold down on the shift key, and grab one of the corners and make the selection much larger.

      8. If you are not sure about the size, whether it is big enough or whether it is too big, then move move EVERYTHING at once not just the cat so that it is on top of the stage. Make certain that the cat is almost the same height as the stage. If it is still not big enough, then repeat the above action: hold on the shift key and grab the corner to make it even larger.

      9. When it is the correct size, make sure the cat is on the stage and that you can see its entire body within the confines of the stage. Once again, you must be careful when you move the cat that you move EVERYTHING TOGETHER and not just the cat.

      10. Extend the duration (F5) of the stars and moon layers to the last frame.

      11. So that the viewer can see the cat at this point, enlarged like this to what we call a medium shot for a moment, we must increase the number of frames. If we look at the timeline right now, we see that the motion tweens end at frame 500, and that's it. Everything is this large for only that one frame. In order for it to last longer we should extend the duration for a few frames, say 40 or 50 more frames, out to frame 550.

        To do this, click in frame 550 of the cat layer, hold onto the shift, click in the other layers (cat, fence, shadow, house, ground) and select F5.

       
    3. REVIEW II: Character Symbols
      1. Graphic Symbols—making the entire drawing one single symbol:
        1. Following last Monday's class, after you have drawn your cow character, select the entire drawing (if there is nothing else on the stage, click in frame 1 of the layer to this).
        2. Click on F8 to Convert to Symbol.
        3. Give it a unique name (name it cow), select graphic for behavior, and then click okay.
         
      2. Complex Symbols—creating nested symbols: symbols within symbols
      3. Sometimes it is necessary to create complex symbols. In the following situation, we will make the head, the body, the legs, and the arms into separate symbols. First, we must break apart the graphic symbol that we have already created. To do this, select the cow symbol by clicking on it one time.
      4. Next, break the symbol apart by selecting ctrl-B. At this point, the drawing of the cow on the stage is no longer a symbol instance; however, if you look into the library, you will see that you still have the symbol there.

      5. Now, select only the head of the cow. To do this you must use the arrow tool, and zoom up very close. Make certain you get all of the pieces of the cow’s head in the selection. It is very important that you do not leave any piece of the head out of your selection.
      6. Next, once you select the head, choose the arrow tool (V) and move the head away from the body.
      7. If you find that there are pieces of the head left out, little fragments of lines or color, then undo until the head goes back into place, and try selecting again.
      8. Once you select the head and move it away from the rest of the cow’s body, then convert it into a symbol (F8).
      9. Give it the name cow_Head, select graphic for behavior, and then click okay.

      10. Now, look at the cow’s body. You should notice that there are little gaps in the body where the head used to be. Fill in these gaps and round them out.

      11. Once done, let us try and select one of the arms of the cow; however, you will probably soon see that in such a case, when you click on the black area, it selects the black on the arm, as well as all the black on the body. So, we'll have to separate the arm from the body by drawing a single line. We can do this with a colored line so that we can see it stand out from the rest of the drawing. We will also know that we have to later delete the line. We can do so with both arms right now.
      12. Now, double-click on one of the arms and move it away from the body. Then, do the same thing to the other arm.
      13. Remember to delete those lines that you drew to separate the arms from the body.

      14. Then, select one arm at a time and convert them to graphic symbols. Name them cow_arm1 and cow_arm2.
      15. We need to do the same thing for the legs, although with this particular cow, they will be a bit easier than the arms. Therefore, simply select each leg, one at a time, move them away from the body, and convert them into symbols named cow_leg1 and cow_leg2. Don't forget to round out the tops of the legs, and to remove the strokes there.
      16. Before we convert the body into a symbol, you may have noticed that there are gaps missing from the body, chunks cut out where the arms used to be. We must fill these two areas in before we convert the body into a symbol. To do this, we must use the line tool again to close off the spaces, and then the paint bucket to fill them in.


      17. Finally, select the body, and convert it to symbol (F8). Give it the name cow_body, select graphic for type, and then click okay.
      18. Now that we have at least five graphic symbols, you may try to put them all back into place, as in a puzzle. You will find that the head is below the body, partially hidden by the body. To correct this, select the head by clicking on it one time.

      19. Next, go to Modify >> Arrange >> Bring to Front. This will put it above the body. Repeat this for the arms so that they are also above the body.


    4. Movie-Clip Symbols—combining all the individual graphic symbols into one single movie-clip symbol:
      1. Once the cow is reassembled and looks like it did originally, we will put it together into a single symbol. As it is now, it is composed of six parts: the head and the body, the two arms, and the two legs; but we want to envelope all of these parts together in a single symbol. To start, we must select all the symbol instances, each of the body parts together.
      2. They must all be selected in order for this to work, so make certain you see blue boxes around them all. If so, then click on F8, convert to symbol.

      3. Give this new symbol the name of cow_mc, select Movie Clip for type, and then click okay.


    5. Animated Symbols I—creating symbols that move: Moving Head
      1. The reason we are doing this is because we are going to make the head move back-and-forth as the script calls for. The graphic symbol is usually a static symbol, meaning there is no movement within it. The movie-clip symbol, on the other hand, is a dynamic symbol. It often is a symbol that contains animation. In order to make our new movie-clip into an animated symbol, we must therefore put animation inside of it. To do this we must go into the symbol (into symbol-edit mode). As we have learned, to go into symbol edit mode we must double click on the symbol or symbol instace.

        So, using the arrow tool (V), double-click on the cow_mc symbol. Once you do this, look in the upper-left-hand corner of the window and you will see scene 1, cow_mc. This tells us we are currently working inside the cow_mc movie-clip, in symbol-edit mode for the cow_mc symbol.

      2. Since we are going to animate the head to make it move back and forth, we must put the head into its own layer. We can actually put all of the various body parts, the various graphic symbols into their own layers. To do this we must first select all of the symbols. Then, right-click on the selection and choose distribute to layers.

      3. Next, look at all your layers. You will see that this action distribute to layers has given the layers the same names as the symbols within them; however, you might also see a few layers without names, that instead have the names layer 8 or layer 3 or layer 13. More than likely, these layers have little fragments that should be discarded and deleted. Before you do such an action, however, you should always make certain there is nothing in the layer that you need. When you are done, you should only have the layers with the names of the symbols.
      4. Now you have six layers, one with the head another with the body, others with the arms, and still others with the legs. To make certain everything is in the right place, hide one layer at a time. If you hide the body layer the body of the dog should disappear from the stage. If you hide the head layer, the head should disappear from the stage. Do this for each layer to make certain you have all the necessary parts.
      5. Lock all of the layers except the head layer.
      6. Choose the zoom tool (Z) and zoom into the head.
      7. Then, choose the free-transform tool (Q) and select the head.
      8. You should notice the little white circle in the center. This is the center-point of the head symbol. Click and drag it straight down to the top of the nose. This is the point around which the head will rotate when we make the head move back-and-forth.

      9. Now rotate the head a little.
      10. Next, click in frame sixteen (16) of the head layer and extend the duration (F5)—don’t be alarmed if the body disappears.
      11. Once you do this, right-click and add a motion tween to the duration of the head layer.

      12. Then, click back in frame eight (8) of the head layer. You can make sure that you’re in frame eight (8) by checking to see if the red playhead in the timeline is over frame eight. Once you are in frame eight, then, choose the free-transform tool (Q) again.

      13. If the center-point is not still above the top of the snout move it there again, and then rotate the head to the other direction.

      14. Hit enter to see the head move back and forth once.

      15. You should notice that the body disappears but the head remains. That is because there is only one frame in the body layer. When the playhead moves past frame one, then the body disappears. Therefore, we just need to extend the duration of the body out to frame sixteen (16). To do that, you just click in frame 16 of the body layer and hit F5 to extend the sprite (aka extend the duration).

      16. Next, click back on scene one in the upper-lefthand corner to exit symbol-edit mode.

      17. And lastly, select ctrl-enter to view the animated movie-clip looping.


    6. Animated Symbols II—creating symbols that move: Blinking Eyes

      The next thing we'll do is create another movie-clip, but this one will be inside of the cow. We need to have the cow's eyes blinking, which means its eyes need to be animated. Remember, animation is just the change of something across a span of time. It may change colors, or positions, or it may change the way it looks, its size for example; or, in our case, the eyes will change the way they look, from being opened to being closed. Any of these things will constitute animation. Therefore, we will use a movie-clip symbol for the eyes.

      We've already drawn the eyes inside the cow_head symbol, so we must go in there to begin. Using the selection tool (V), double-click on the cow_mc symbol, and then double-click again on the cow_head symbol. These two actions will take you inside of the two symbols. If you look in the upper-lefthand corner, you should see.

    7. Once inside the cow_head symbol, zoom into the eyes, so they are large and fill up most of the screen area. We will need to get into there pretty close.
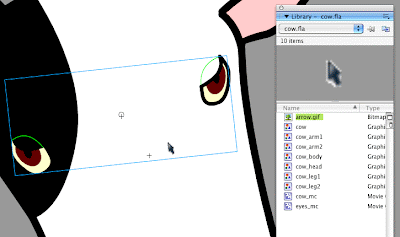
    8. Then, select the eyes. Remember, to select more than one thing, you must hold down on the shift key to add to your selection. Before doing so, however, lines must be drawn to separate the eyes from teh rest of the face. Please note the green lines that were drawn to do just that.
    9. Once you select both the eyes, convert them to a symbol (F8), and name it eyes_mc, choose movie clip for behavior.
    10. Open up the library, and make certain that the eyes_mc symbol is there in the list.
    11. Then, select the eyes ON THE STAGE and delete. Notice that there are holes where the eyes were.
    12. These holes need to be filled up with the paint bucket (K) tool.

    13. Then, from the library, drag the eyes_mc symbol back onto the stage.
    14. Double-click on the eyes_mc symbol, to enter into symbol-edit mode.
    15. Delete the little green lines that were drawn earlier from the eyes.
    16. Next, click in frame 28 and add a keyframe (F6).


    17. Since one eye is surrounded by black, and the other eye is surrounded by white, we are going to treat them each a little differently. First, make certain you are in frame 38. Then, for the one in the black, choose the paint bucket (K) and fill in the whole eye with black. As a result, it should completely disappear.

      For the other eye, the one surrounded by white, delete the stroke at the top, and fill the rest of the eye with white. As a result of this, just a kind of U-shaped stroke remains. This gives the illusion of a closed eye.

    18. Finally, click in frame 30 and extend its duration (F5).
    19. Click back on scene 1 when you have done this to exit the symbol.