Hi everyone, First, I would like to apologize that I was out of class last night. As you might already know I have been ill the last few days. As sad as I know you all must have been to miss me and my class last night, you can be reassured that I will definitely be in class next week ready to go. Regarding your homework from last week, please email it to me no later than this coming Sunday. As I receive quite a few emails, in your email, please indicate the following information: your name, your id#, and your class. In this week's blog posting you will find exercises that help with your drawing skills. As you will be required to create some kind of landscape for your mid-term snowman animation, you should follow some of the ideas that I demonstrate down below; however, keep in mind, that the example that I give is NOT what you should reproduce exactly. It is a more spring-like view than it is winter. Please make setting seem more wintery. I will add additional tutorials as the weekend progresses and as I start to feel better of how to make the snowman animation.
- TOPICS:
- HOMEWORK:
- Storyboard—Please read through the Snowman Story again, and using the storyboard template that I provided to you in last week's posting, please create a storyboard for the animation by drawing the pictures by hand (NOT in Flash). Take the viewer step-by-step through what happens in the animation, drawing each important change. This will be due in TWO WEEKS, but you should have about half of it due by next week.
- Animation—You must begin experimenting with your animation. I know that I was not there this week to demonstrate how to begin, but you should try yourselves nonetheless. Read the first paragraph of the Snowman Story and complete this part of the animation by next week. This must occur in the scene that you drew for last week's homework. Please bring all your homework to class next week.
- SIMPLE DRAWING EXERCISES:
- Creating a simple Graphic Symbol:
- Once you draw your cloud or tree, it should be converted to a symbol (F8) like many of the other much more simple objects we have draw thus far, ovals and rectangles mostly.
- To do so, after you have drawn your cloud, for instance, you must choose the selection tool (V) and select the entire cloud.
- Then select F8, convert to symbol.
- Give it the name cloud, select graphic for behavior and then click okay.
- Now you will see that it has a blue box around it when it is selected. If you de-select by selecting escape or by clicking on the background somewhere, you will see the blue box disappears.
- One thing you should remember is that since the cloud is now a symbol, you must not double-click on it, as this will take you into symbol-edit mode for the cloud.
- If you do wish to edit your symbol, then do double-click on it; however, you must remember to exit symbol-edit mode by clicking on Scene 1 in the upper-lefthand corner of the window.
- If you select F11 or ctrl-L the Library will open up. To close, you simply select F11 orctrl-Lagain. Once open, you will see a smaller representation of your circle symbol there. If there are more symbols, you will see them all listed there. Here is where your symbols are stored. What is on the stage is known as a symbol instance. It is like a clone, or a copy of what is in the library. Symbol instances may be deleted from the stage without affecting the symbol in the library. However, take great care of your symbols in the library. Do not delete the symbols from the library if you are using them in your movie. If you delete the symbols in the library, they will also be deleted from the entire movie.
- You may use as many symbol instances as you need. All you need to do is drag an instance from the library onto the stage.
- After you draw the tree, you should do the same and convert it into a symbol too (F8).
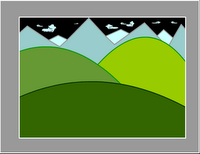
- Creating a Simple Landscape:
- If you haven't drawn your tree or cloud yet, or if you have not yet converted them into symbols, then look at the above exercise to do so first: LINK
- Once you have created your symbols, make sure that for now you have only one instance of each of them on the stage. Click one time on the tree and cloud to make sure they are symbols. If the blue box appears around them when they are selected, then they are probably symbols.
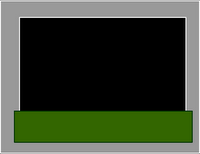 Next, look in your library (ctrl-L) and make certain both symbols are there. If so, then you're all set, so delete both of them from the stage, but careful not to delete them from the library.
- Next, in the timeline, double-click where it says layer 1 and type the name ground
- Then, choose the rectangle tool (R) and draw a rectangle over the bottom part of the stage.
- Adjust the fill and stroke colors of the rectangle if you need to.
- Manipulating Layers:
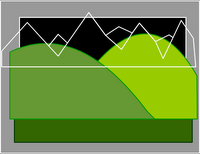
- Foreground & Background: When objects are placed in a landscape, to give the illusion of depth, they take on different sizes. Objects that are far away from the viewer, the camera, appear smaller. Objects that are nearer appear larger. To convey this relative size and relative distance, the free-transform tol (Q) is used to resize an object such as trees that are either further away or closer to the camera.
- Add a new layer and name ittree-near.
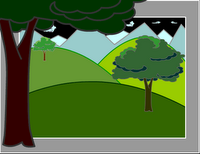
- Open the library (ctrl-L or F11) again, and drag another instance of the tree symbol onto the stage.
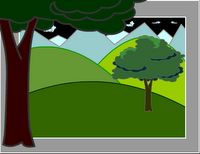
- Again, use the free-transform tool (Q)to resize the tree until it is much larger. It should hang off the edges of the stage significantly. Place it so that it rests along the left edge.
- Next, select this tree on the stage using the selection tool (V), open the properties bar, and click where it says color and select brightness. Make the tree darker as it is nearest to the viewer.
- Now, lock the tree-near layer.
- Open the library (ctrl-L or F11) once again, and drag a third instance of the tree symbol onto the stage.
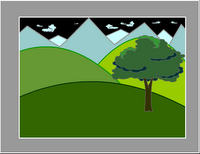
- Use the free-transform tool (Q)to resize the tree until it is much smaller. Place it so that it rests on one of the background hills.
- Add a new layer and name ittree-near.
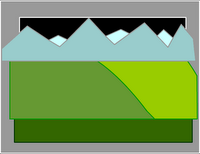
- Dim, Hazy Distance: To further provide an illusion of distance, objects that are further away from the viewer, from the camera, appear dimmer or lighter or hazier. This is due to the effects of the atmosphere and water-vapor. Color and symbol effects may be used to help provide this effect.
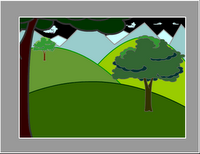
- Select this smallest tree on the stage using the selection tool (V), open the properties bar again, click where it says color and select brightness. Make the tree lighter as it is furthest from the viewer.
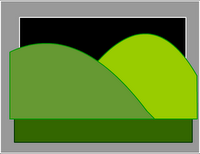
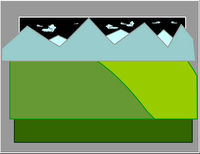
- Save and test (ctrl-enter) the movie, and it will look like the following image.
- Finally, you may also add these effects to the clouds, making them lighter, or, perhaps somewhat transparent with alpha.
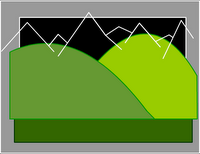
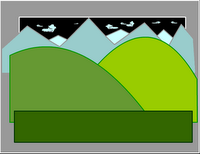
- Save and test (ctrl-enter) the movie, and it will look like the following image.
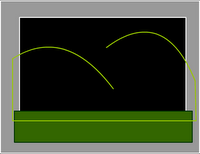
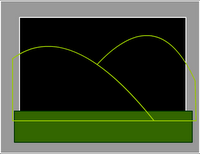
- SNOWMAN ANIMATION: Below, you will see the first step of the snowman animation as it is described in the first paragraph of the Snowman story. Notice two things: first, how many layers there are and what their names are; second, how many frames each part of the animation takes. Remember, the lavendar areas are the motion tweens.
- Create your first layer and name it mountains.
- In this layer, draw the two mountains in the background as described in the Snowman Story.
- Now lock this layer.
- Create a new layer and name it ground.
- In this layer draw the ground in the foreground where the snowman will be standing.
- Now lock this layer too.
- Create a new layer and name it snowman1.
- In this layer, draw the large circular snowball that will form the parts of the snowman. You may use any tools you wish to do this. I used the brush tool (B) to make mine because I didn't want it to be an absolutely perfect circle as the oval would probably have done. I then created a radial gradient and used the paint bucket (K) tool to fill it up. Afterwards, I selected the brush tool (B) again and made some marks to make the snowball seem irregular.
- Once you complete your snowball, select the entire thing and convert it to a symbol (F8).
- Give it the name snowball, select graphic for type, and then click okay.
- Place the snowball symbol off the stage to the right-hand side.
- Choose the free transform tool (Q) and make the snowball a little bit smaller. To do this, remember, you must hold onto the shift key and drag on one of the corner handles.
- Now, in the timeline in the snowman1 layer, click in frame 1 and then release.
- Once you release, click again and hold down. Before you let go, drag it to frame 10 and then release. This will move the keyframe to that frame, frame 10.
- Next, since the part of the animation in which the snowball rolls into the stage is supposed to take one and a half seconds (check the Snowman Story), this means that it should take 18 frames. Recall, the frame rate is 12 frames per second. This means for one second there are 12 frames of animation. Therefore, if you need 1 1/2 seconds of animation, you need 18 frames. I altered this a little and made it 20 frames in my animation. What you should do next, then, is to click in frame 30 of your animation in the snowman1 layer and add a keyframe (F6).
- Now, move the snowball to a position on the stage somewhere in the middle.
- Make the snowball larger now using the free transform tool (Q).
- Once you have done this, in the timeline between the keyframes in the gray area, right-click and select create motion tween.
- Then, click somewhere in the timeline in the lavendar area of new motion tween.
- Open up the properties bar and locate where it says rotate.
- Since the snowball is moving to the left, we want it to rotate in the counter-clockwise direction, so select CCW, and the number of times it should rotate is one.
- Next, click in frame 35 of each layer one at a time and extend the duration (F5).
- Lock the snowman1 layer, add a new layer, and name it snowman2.
- Click in frame 35 of this layer and add a new keyframe (F6).
- From the library (F11 or crl-L), drag an instance of the snowball symbol onto the stage off to the right side like the first one.
- Make this snowball even smaller than you did the first one.
- Next, click in frame 55 of this layer, and add a keyframe (F6).
- Move the smaller snowball next to the first one and then make it a little larger.
- Now add your next motion tween between those two keyframes, frames 35 and 55.
- You should also make this rotate CCW and one time.
- For the last part of this section of the animation, you should try to do on your own, and that is to let the invisible person lift up the snowball and put it on top the other one. You should read the snowman story very closely and follow its directions. Also, look at my animation above. Pay particular attention to how many keyframes I used and where I used them. See what you can do by the next class.
- Storyboard—Please read through the Snowman Story again, and using the storyboard template that I provided to you in last week's posting, please create a storyboard for the animation by drawing the pictures by hand (NOT in Flash). Take the viewer step-by-step through what happens in the animation, drawing each important change. This will be due in TWO WEEKS, but you should have about half of it due by next week.





No comments:
Post a Comment