Hi everyone, Very nice class this week. I was pleased by what everyone did. You are all beginning to grasp how to use the drawing tools. For homework, you will have to do some drawing and start on the Mid-Term Project. Perfect is NOT what we're after the first time out, just make sure you don't forget to do it. What I want is for you to try your best on the animation. We will clear up any difficulties or mistakes you make in class next week. What I DO want is for you to spend a lot of time on your drawings to make certain they are nice. Have a nice weekend, Carter-
- TOPICS:
- HOMEWORK:
- Draw:
This week, work on your mid-term projects:
-
First, you'll need to come up with an idea for your FINAL ANIMATION. My suggestion is that you choose something simple, such as a nursery rhyme or poem, but there has to be a kind of story, with a beginning, middle, and an end.
Humpty, Dumpty and Little Miss Muffet are good examples you may use.
You do NOT have to do anything with this story yet in Flash, just come to class with your idea.
- You need to type on a piece of paper your idea. Feel free to use my two ideas above, Humpty, Dumpty or Little Miss Muffet. You must then type a list of the characters in your idea.
-
Next, you need to draw either on paper or in the computer a sketch of two of the characters in your animation idea. These do not have to be perfect yet, as I just want you to sketch out your idea. When you're drawing your character, remember the idea to begin with simple shapes like triangles or ovals as we did in class.
The two should go together. What I mean by this is that they should have a similar look. They should look like they belong in the same animation, and not with completely different styles.
As mentioned, you may draw this on paper or in the computer. You may use other cartoons as examples to get ideas, but your drawing MUST be original.
-
- Quiz:
You should also be prepared to take a QUIZ in the beginning of the next class. This will include knowing how to create graphic symbols and motion tweens, and keyboard shortcuts for the following:
- save => cmd + s
- open => cmd + o
- print => cmd + p
- undo => cmd + z
- copy => cmd + c
- cut => cmd + x
- paste => cmd + v
- paste-in-place => cmd + shift + v
- extending-the-duration => F5
- as well as how to create a functioning motion tween
- SIMPLE DRAWING EXERCISES: Below you will see some examples and tutorials as to how to draw certain objects.
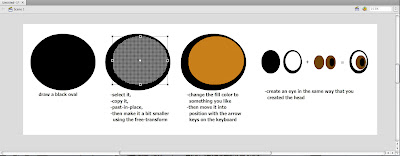
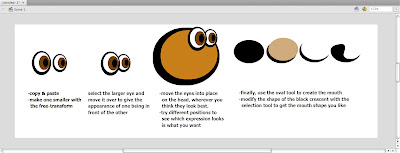
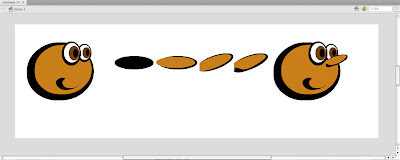
Creating a face:
(click on the images below to make them larger)
- Creating a simple Graphic Symbol:
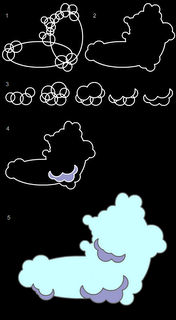
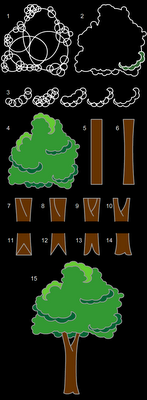
- Once you draw your cloud or tree, it should be converted to a symbol (F8) like many of the other much more simple objects we have draw thus far, ovals and rectangles mostly.
- To do so, after you have drawn your cloud, for instance, you must choose the selection tool (V) and select the entire cloud.
- Then select F8, convert to symbol.
- Give it the name cloud, select graphic for behavior and then click okay.
- Now you will see that it has a blue box around it when it is selected. If you de-select by selecting escape or by clicking on the background somewhere, you will see the blue box disappears.
- One thing you should remember is that since the cloud is now a symbol, you must not double-click on it, as this will take you into symbol-edit mode for the cloud.
- If you do wish to edit your symbol, then do double-click on it; however, you must remember to exit symbol-edit mode by clicking on Scene 1 in the upper-lefthand corner of the window.
- If you select F11 or ctrl-L the Library will open up. To close, you simply select F11 orctrl-Lagain. Once open, you will see a smaller representation of your circle symbol there. If there are more symbols, you will see them all listed there. Here is where your symbols are stored. What is on the stage is known as a symbol instance. It is like a clone, or a copy of what is in the library. Symbol instances may be deleted from the stage without affecting the symbol in the library. However, take great care of your symbols in the library. Do not delete the symbols from the library if you are using them in your movie. If you delete the symbols in the library, they will also be deleted from the entire movie.
- You may use as many symbol instances as you need. All you need to do is drag an instance from the library onto the stage.
- After you draw the tree, you should do the same and convert it into a symbol too (F8).
- Creating a Simple Landscape:
- If you haven't drawn your tree or cloud yet, or if you have not yet converted them into symbols, then look at the above exercise to do so first: LINK
- Once you have created your symbols, make sure that for now you have only one instance of each of them on the stage. Click one time on the tree and cloud to make sure they are symbols. If the blue box appears around them when they are selected, then they are probably symbols. Next, look in your library (ctrl-L) and make certain both symbols are there. If so, then you're all set, so delete both of them from the stage, but careful not to delete them from the library.
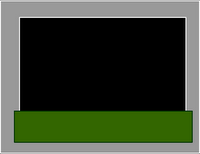
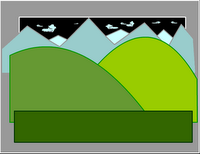
- Next, in the timeline, double-click where it says layer 1 and type the name ground
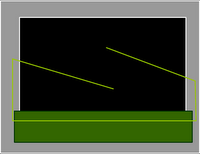
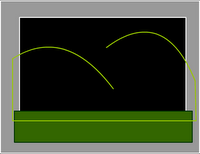
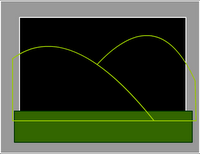
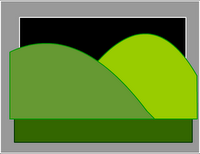
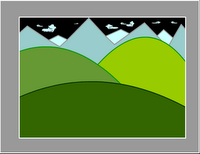
- Then, choose the rectangle tool (R) and draw a rectangle over the bottom part of the stage. Adjust the fill and stroke colors of the rectangle if you need to.
- Manipulating Layers:
- Creating a simple Graphic Symbol:
- Foreground & Background: When objects are placed in a landscape, to give the illusion of depth, they take on different sizes. Objects that are far away from the viewer, the camera, appear smaller. Objects that are nearer appear larger. To convey this relative size and relative distance, the free-transform tol (Q) is used to resize an object such as trees that are either further away or closer to the camera.
- Add a new layer and name ittree-near.
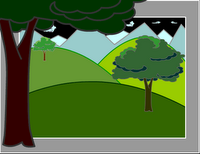
- Open the library (ctrl-L or F11) again, and drag another instance of the tree symbol onto the stage.
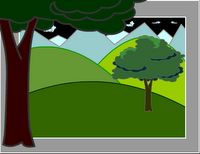
- Again, use the free-transform tool (Q)to resize the tree until it is much larger. It should hang off the edges of the stage significantly. Place it so that it rests along the left edge.
- Next, select this tree on the stage using the selection tool (V), open the properties bar, and click where it says color and select brightness. Make the tree darker as it is nearest to the viewer.
- Now, lock the tree-near layer.
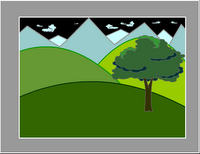
- Open the library (ctrl-L or F11) once again, and drag a third instance of the tree symbol onto the stage.
- Use the free-transform tool (Q)to resize the tree until it is much smaller. Place it so that it rests on one of the background hills.
- Add a new layer and name ittree-near.
- Dim, Hazy Distance: To further provide an illusion of distance, objects that are further away from the viewer, from the camera, appear dimmer or lighter or hazier. This is due to the effects of the atmosphere and water-vapor. Color and symbol effects may be used to help provide this effect.
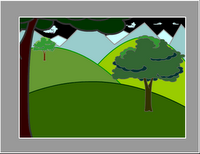
- Select this smallest tree on the stage using the selection tool (V), open the properties bar again, click where it says color and select brightness. Make the tree lighter as it is furthest from the viewer.
- Save and test (ctrl-enter) the movie, and it will look like the following image.
- Finally, you may also add these effects to the clouds, making them lighter, or, perhaps somewhat transparent with alpha.
- Save and test (ctrl-enter) the movie, and it will look like the following image.





No comments:
Post a Comment